Easy DIY Facial Toner

These are busy times and we are all busy people. There is a time and a place for intricate and complicated DIYs, but this is not that time or that place.

As a new mom and mom of three, my time is precious. Also important is my need to nourish myself and my skin with natural ingredients.

This easy DIY facial toner is extremely easy to make. It will take you about two minutes. You don’t even need two hands, as I demonstrate in the video. My newborn was asleep in my arms the entire time.

Here’s what you’ll need if you’re following along with the video to make this easy DIY facial toner:

Ingredients/Items:

glass jar (my jar was 12 ounces)

witch hazel

lavender essential oil

helichrysum essential oil

juniper berry essential oil

cedar bark tincture (optional- but soooo lovely)

My book Natural Beauty from the Outside In can be ordered here and is available wherever books are sold.

Postpartum Hemorrhage: A Birth Story

This post doesn’t fit in a neat little category, it diverges a bit from my typical posts. This is my birth story, well my third and most recent son’s birth story. It’s a survival story. A scenario that could come knocking on the door of any woman giving birth. I’m sharing here because there’s power in sharing. And hey, it’s my blog, if I can’t write what I want here, then what’s the point ,).

They say the veil between life and death is thin when giving birth. I never thought much about it until I gave birth to my third child.


My actual labor and delivery was by far the smoothest of all of the boys. We arrived at the hospital at 2pm on February 16th and by 2pm on the 17th, he had arrived. I was in active labor for less than five minutes. it was miraculous! I was intent on a VBAC and it happened. I was overjoyed. My little boy slid out without hesitation after two pushes. I sank into my yogic breaths and didn’t even scream out. At only six pounds, he was small, there was no tearing, no trauma, no drama.


Immediately I got to hold this beautiful new soul. We were skin to skin, he latched right away. It was love at first sight. I reveled in the sacredness of the moment, until after the umbilical cord stopped pulsing before delivering the placenta. My husband cut the cord.


Placenta delivered, we laughed and joked with the doctor and nurses. I was so relieved it was over, and that he was here, healthy and beautiful.

Pictures were taken. Relatives were called, the good news shared. I was famished.  A Grubhub order for celebration sushi was placed.


The doctor was still in the room chatting with one of the midwives in training. The nurse was updating my chart on the computer next to my bed, when it happened.


There was sudden pressure in my abdomen and then the sensation of a pop. As if a champagne bottle had just been uncorked, a fizzy volcanic eruption unleashed, I felt a gush of warmth between my legs. I called out to the doctor. As he came over to me, the smile on his face dropped. The midwife ran over followed by the nurse. They were pressing my stomach to check my uterus, trying to determine where the bleeding was coming from. The room filled with nurses and doctors. I started to get dizzy.


I looked at my husband, his face helpless as the doctor spoke with him. He gave me a terse smile. Then his outline grew blurry. I was very dizzy. Everyone seemed like they were moving in slow motion, the room became black and white.


“Transfusion,” I heard one doctor say.

“Emergency surgery,” I heard another doctor said.


My nursing newborn was taken from my chest. I was being lifted out of my bed and placed on a gurney.


At least I got to hold him. I remember thinking as they wheeled me towards the elevator. At least there are photos of me holding him, so that he can see how happy I was.


It’s hard to describe the feeling of your life force leaving your body. It was slow. I had time to reflect but not time to process. I tried to communicate but my words were jumbled and slurred. By the time we had reached the elevator, I had passed out.


I came to nine hours later, in the same room where I had given birth. My husband was by my side holding our son. A new nurse was typing loudly, updating my chart on the computer station beside my bed.  


My throat was sore and dry, my lips cracked from where I had been intubated. Postpartum hemorrhage, the nurse eventually explained.


It would be the next day before I was able to feel the pain in my abdomen from the surgery. The next week before I truly began to process what had happened. How close I had been to death’s door.


Postpartum hemorrhaging is one of the leading causes of maternal death. I am eternally grateful to the doctors and nurses who saw me, who heard me, and whose swift and compassionate actions saved my life. Being earthside with my boys is a gift I will never take for granted. 


During birth, we loose a lot of heat and life force. The recovery process is vital. It is helpful for new mothers to warm themselves from the inside out with their food choices. Here are two recipes for warm and mildly spicy drinks that will help ignite a gentle internal heat:

Turmeric Tea

Zanzibar Spiced Coffee

Broths are fantastic as well, particularly bone broth to assist in building blood.

Have you or someone you know experienced a postpartum hemorrhage? Do you have a birth story to share?

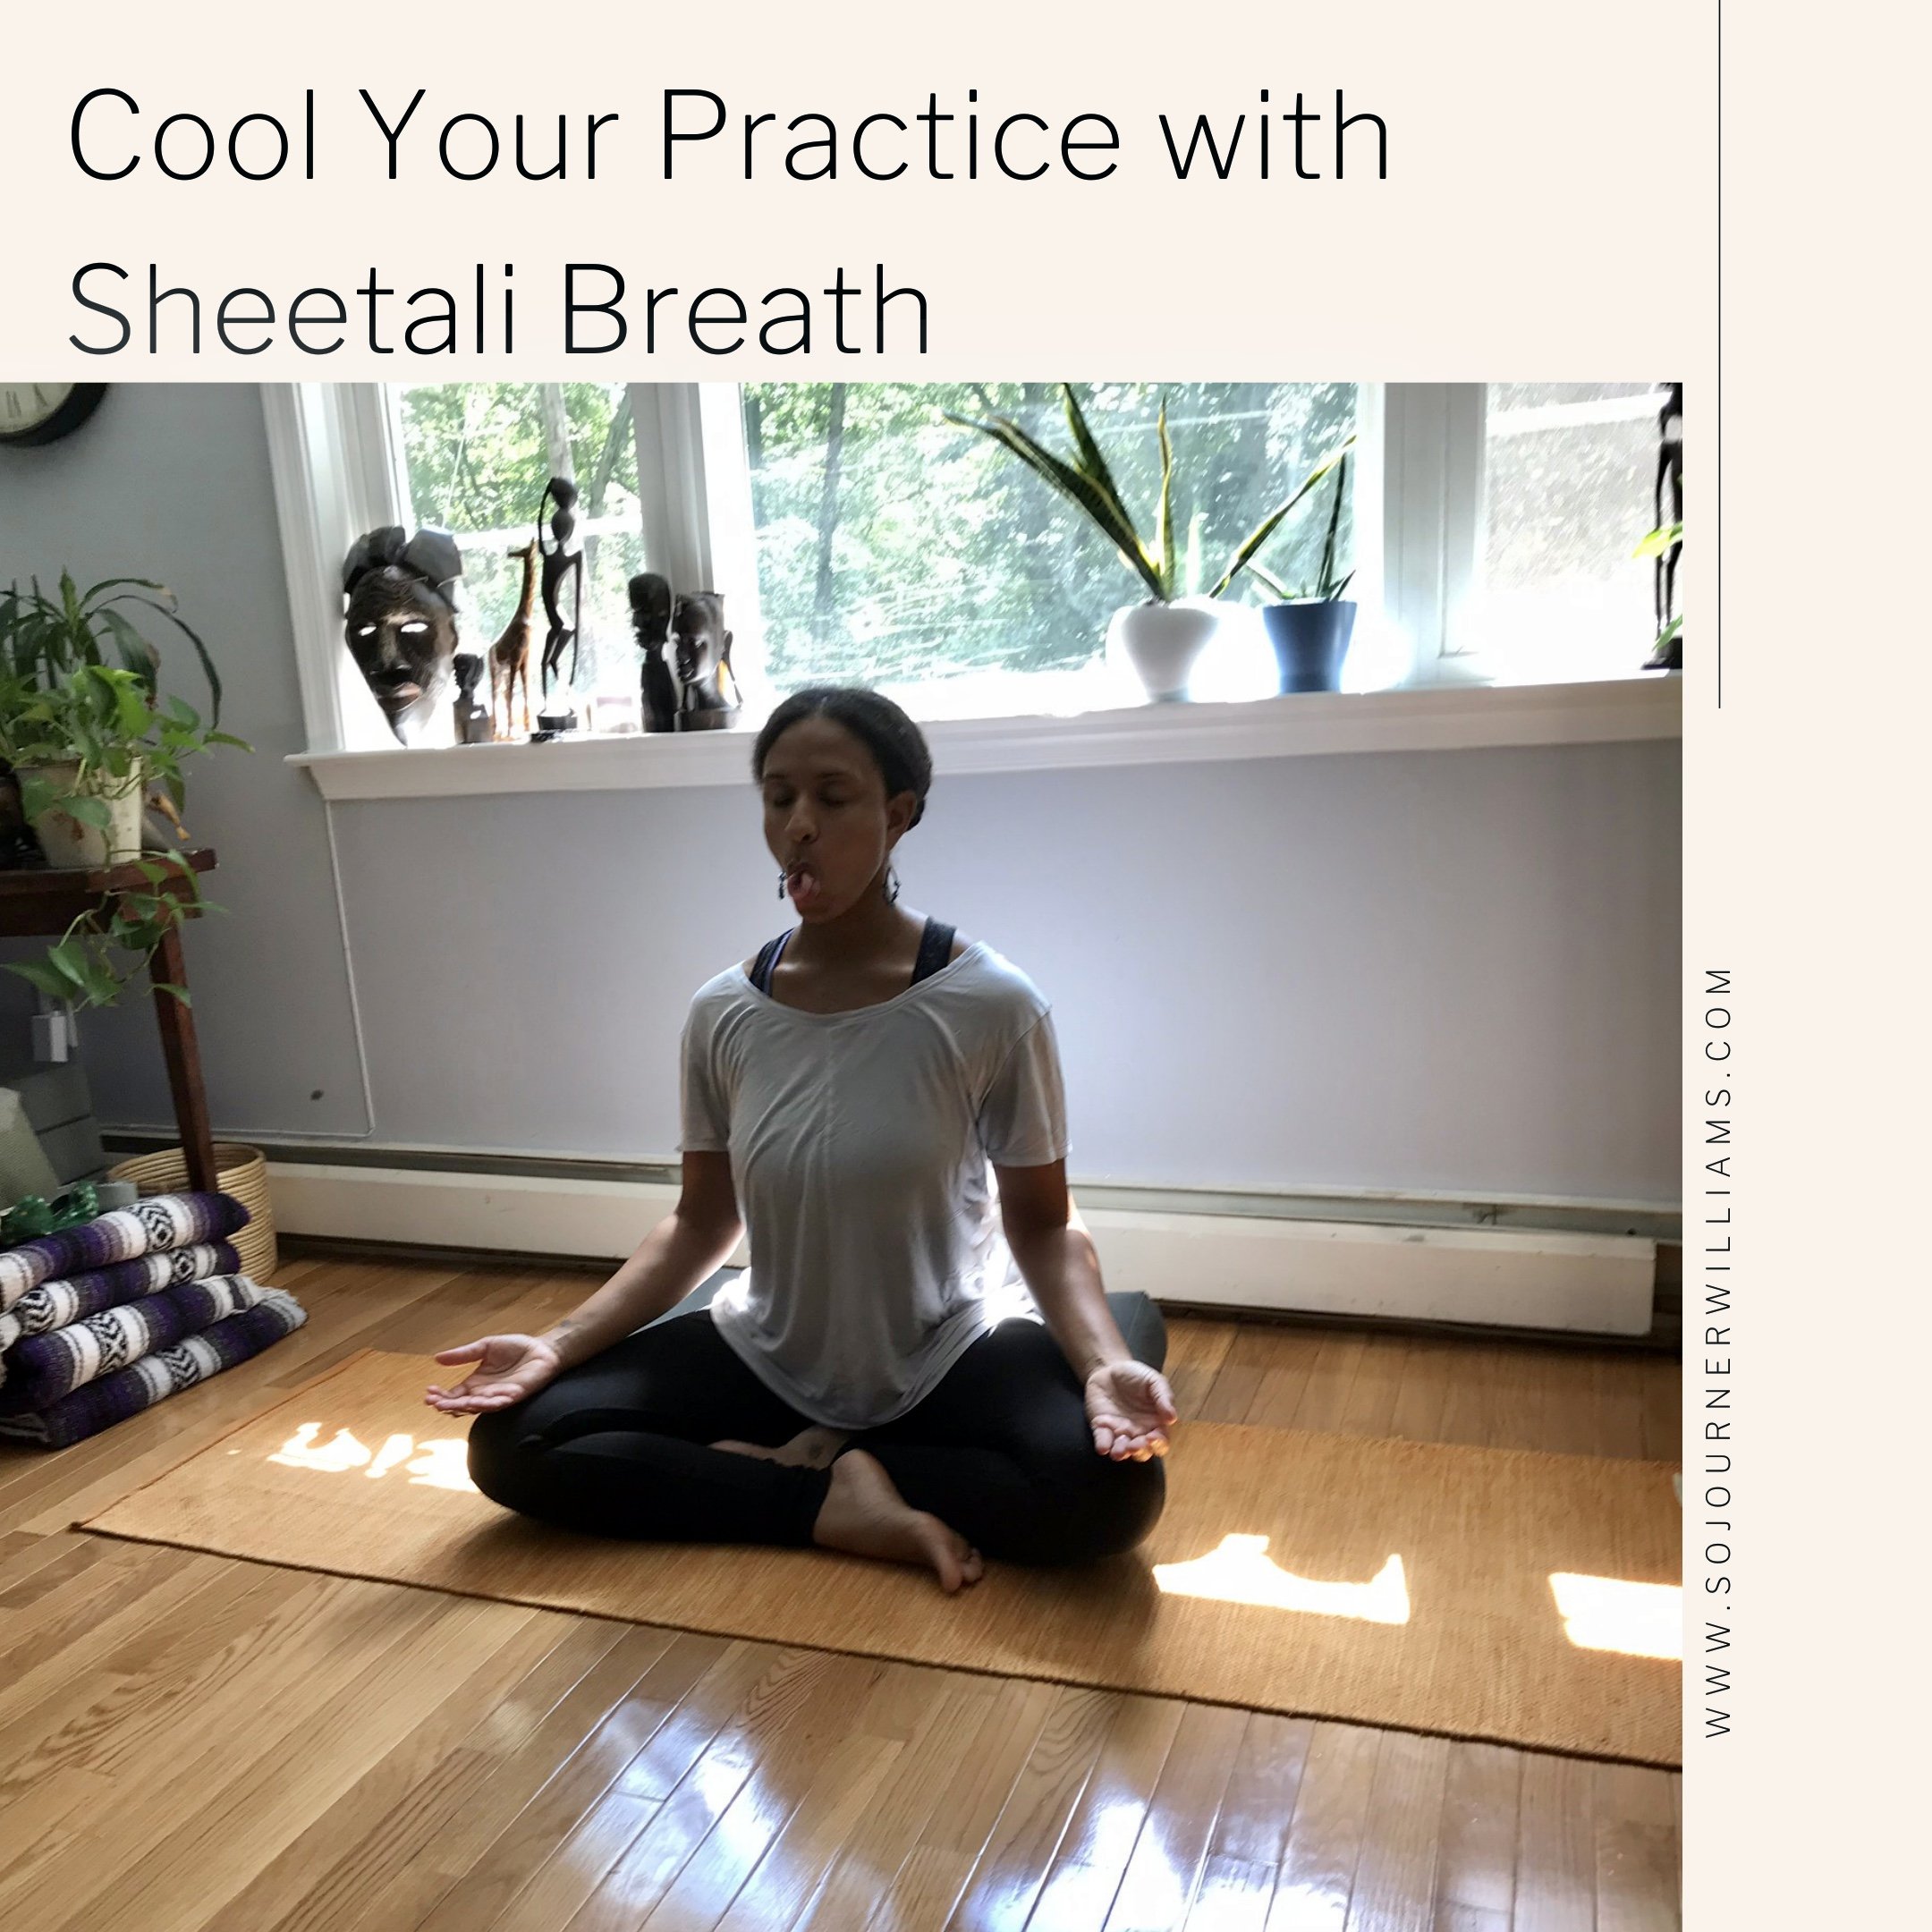
Cool Your Practice With Sheetali Breaths

Practicing yoga during the summer months has its benefits. The warm weather can help to relax muscles and joints providing ease with flexibility and mobility. If you’re a morning practitioner, the early sunrise can give your morning practice an energetic boost. Summertime also provides  many wonderful opportunities to practice outdoors in nature.

The summer months can have their challenges though, particularly when it comes to heat and feeling overexerted. Luckily, through the practice of pranayama- breath control, which is large part of the yogic practice, you can learn to balance and counteract heat inside and outside of the body.

 Sheetali Breath is deeply cooling and rejuvenating and is known to cool both our internal temperatures and tempers. Sheetali breath is best practiced with a curled tongue, but if that’s not a possibility, there is a modification.


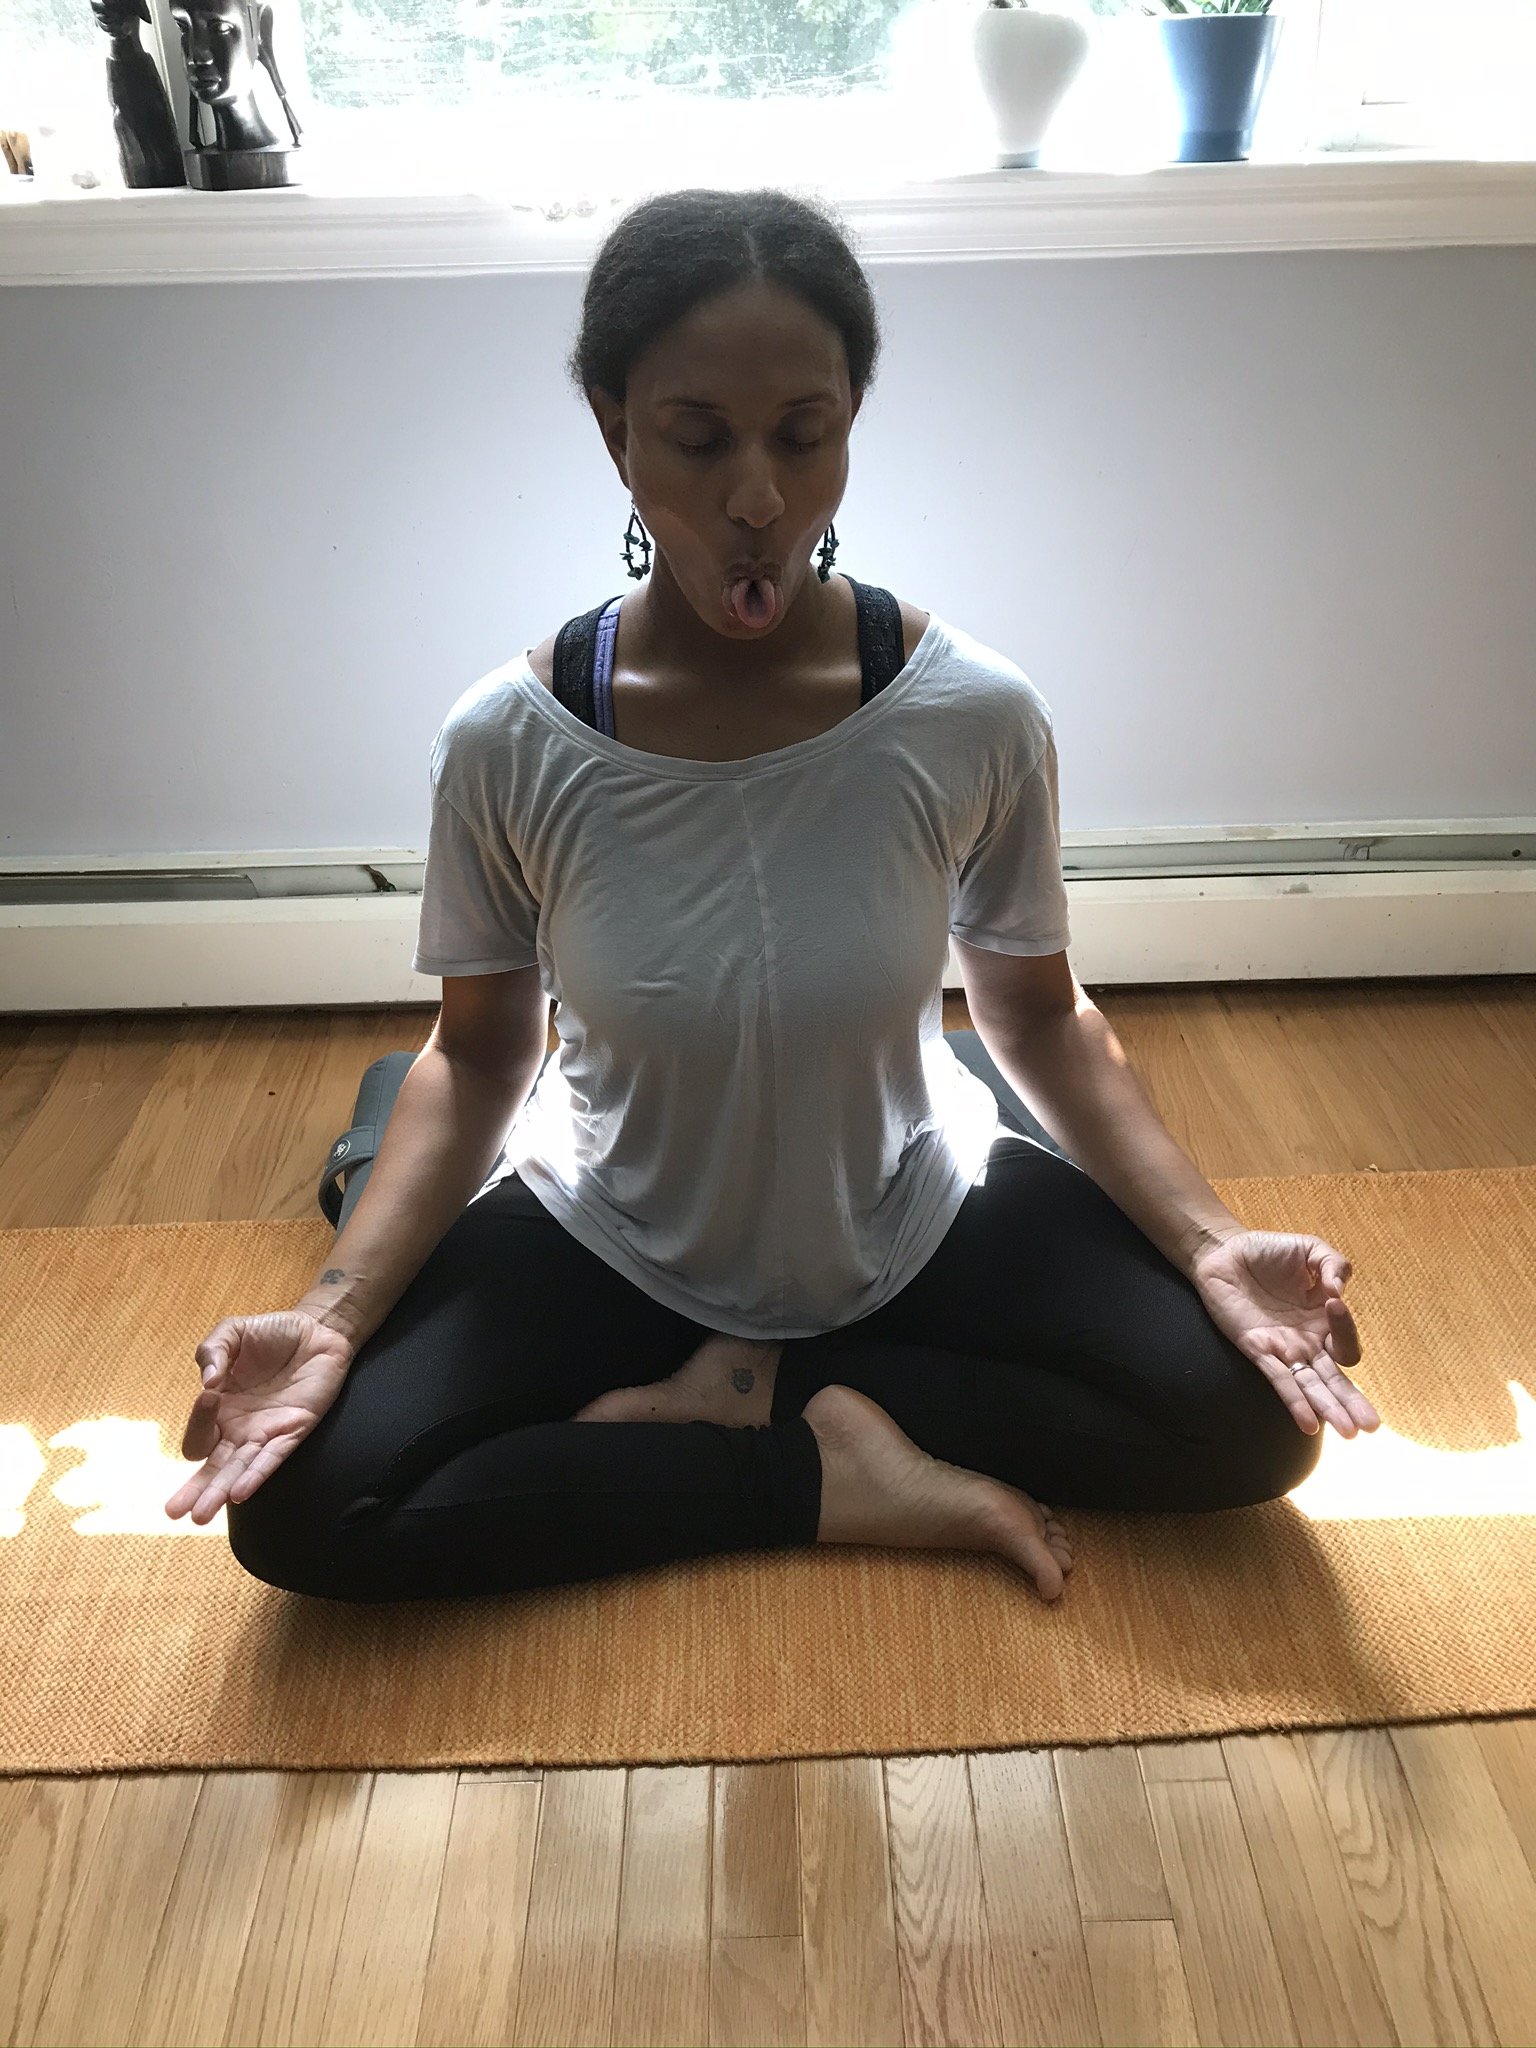
To practice Sheetali breath, curl your tongue if you’re able and slide it between puckered lips. Inhale deeply through the mouth as if you’re drinking through a straw (your tongue serving as the straw) allowing the cool air burst to enter the body creating a sense of expansion. To exhale, release the breath completely, also through the mouth, taking your time to fully empty yourself. Repeat for several rounds. 


If curling the tongue is not an option, pucker your lips as if you’re preparing to whistle. Allow your jaws to relax and your tongue to soften against the lower palette of your mouth. To practice this variation of Sheetali breath, inhale deeply through the mouth as if drinking in the air and when you’re ready to exhale, release the breath completely. 


Since the Sheetali breath practice is so cooling and filled with the elements of air and ether, it’s a wise idea to practice this breath in seated cross legged position, which is extremely grounding and stabilizing as it will create balance by adding earth and water energy. To find comfort in seated cross legged position, you may opt to elevate your hips on a blanket, pillow or bolster, so that your spine lengthens and the hip flexors find ease. Invite your limbs to relax and draw your shoulders away from your ears. 


Once you’re comfortable and still, it’s time to begin your cooling Sheetali breaths. 

Root to Rise with Gyan Mudra

 What if I told you that you could ground and calm your energy, balance your hormones, release stress, reduce anxiety and mitigate symptoms of depression by pressing your index and thumb finger pads together? 

 With Gyan mudra you can establish roots that will help you to rise!

IMG-6372.jpg

Gyan mudra, perhaps one of the most iconic mudras in terms of recognition, is deeply powerful and has the potential to transform your physical, emotional and spiritual energy. 


Mudras are specific hand positions designed to bring about a particular physical or energetic result. Mudras are often practiced in conjunction with meditation and or yoga, but they can be a practice in and of themselves as well. 


Gyan mudra or “wisdom mudra” as it is also called can be practiced by bringing the thumb and index finger to touch creating a circular shape between the two fingers. The touch should be firm enough to feel the fusion of the thumb and index fingers but not so hard that it’s distracting.  Extend your middle through pinky fingers and then lengthen your arms, rotating your palms to the sky, settling your knuckles on your knees. Lengthen your spine, anchor your sits bones and invite your muscles to relax. 

IMG-6370.jpg


You can take deep yogic breaths here while practicing Gyan mudra, drawing your internal gaze to the space between your eyebrows (your third eye center), or you can gaze down toward the tip of your nose. Allow your breaths to expand, your muscles to soften and surrender to the present moment. 


Gyan mudra, as an independent practice should be held for at least seven minutes. Once you’ve found comfort with a seven minute hold, then you may want to increase that to eleven minutes, twenty-one minutes, thirty-three minutes and up to the recommended 45 minutes.


Gyan mudra works with the root chakra to ground the practitioner so that they are able to draw that energy from the root to the crown chakra in order to open up to and connect with their higher selves- hence the nickname “wisdom mudra.”


“All that is gold does not glitter,
Not all those who wander are lost;
The old that is strong does not wither,
Deep roots are not reached by the frost.

From the ashes a fire shall be woken,
A light from the shadows shall spring;
Renewed shall be blade that was broken,
The crownless again shall be king.” 
― J.R.R. Tolkien

Surprise Vegan Chocolate Chip Cookies

IMG_3312.jpg

Whether you like it or not, the holiday season is now in full swing and after the year that we’ve had, we can all use a bit of sweetness in our lives.

The recipe I’m about to share below is truly phenomenal. I’m not just saying this because it’s mine, it’s really, truly, delicious. The cookies that will result, are the most undercover vegan chocolate chip cookies I’ve ever had.

If you’ve tried vegan baking, you know what I mean. There’s often a xylitol aftertaste and gummy consistency to vegan baked goods. I personally am not a fan and when I made the commitment to go vegan, I also made the commitment to continue to enjoy my food and treats to the fullest- especially during holiday season.

This recipe is kid and non-vegan folks tested. It is also has some other surprise bonuses, the cookies are lower on the glycemic index and free of processed, refined sugars - woot!

IMG_3312.jpg

So here you go, Sojourner’s “Surprise Vegan Chocolate Chip Cookies.” This recipe was cross adapted from The Joy of Cooking and The Pioneer Woman and sprinkled with some Ayurvedic and vegan magic dust.

Surprise Vegan Chocolate Chip Cookies

IMG_3313.jpg

Here’s What You’ll Need:

1 cup vegan butter (Mykonos brand is my favorite! It’s buttery tasting and soy free)

1 cup firmly packed brown sugar

1/2 cup date sugar

Vegan flax eggs (2 tablespoons ground flax + 5 tablespoons room temperature water/ stir to combine and set aside for 10 minutes until it congeals forming an egg-like consistency).

3 teaspoons pure vanilla extract

2 1/4 cups all purpose flour

1 teaspoon baking soda

1 teaspoon finely ground pink Himalayan salt

1 1/2 cups vegan chocolate chips (I like the Enjoy Life brand)

Here’s What To Do:

1) Preheat your oven to 375 degrees F

2) In a small bowl, combine the following ingredients: melted butter, brown sugar, date sugar, flax eggs and vanilla extract. Blend thoroughly and set this bowl aside.

3) In a large bowl, combine the following ingredients: flour, baking soda and salt. Make sure the baking soda is evenly distributed.

4) Add the wet ingredients from the small bowl to the dry ingredients in the large bowl.

5) Add the chocolate chips and mix thoroughly.

IMG_3298.jpg

6) If you are working with a non-stick baking tray, add a layer of parchment paper or aluminum foil brushed lightly with coconut or olive oil.

7) Depending upon the size of cookie that you prefer, use either a teaspoon or a tablespoon to drop the batter onto the sheet. Make sure to space out the batter because the cookies will spread.

IMG_3299.jpg

8) If you have any left over dough, you can roll it in parchment or wax paper and freeze for later.

IMG_3302.jpg
IMG_3304.jpg

9) Bake for 10-12 minutes and then set out to cool before serving.

IMG_3312.jpg

10) ENJOY!!!!!!!!!!

IMG_3315.jpg


7 Minutes to Ground Yourself: Guided Meditation

IMG_0006.JPG

Temperature check, how are you?

We are heading into quite a weekend (full moon, daylight savings, Halloween) , and what will be a historic week (election Tuesday 2020). We are STILL in the midst of an unprecedented pandemic and the country continues to reel from social unrest and division, not to mention the recession.

The energy around us can be downright destabilizing and overwhelming, but the energy inside of us doesn’t have to be.

Do you have seven minutes?

Seven minutes to lay on your back in a quiet space?

This grounding guided meditation is my gift to you…

Stay well!

Three Breath Practices to Get You Through 2020!

IMG_0110.JPG

Breathing, as we know all too well, is essential.

If you’re feeling anxious and out of control because of the pandemic, if you’re in mourning over the senseless killings of unarmed black people in America, or if you’re fired up with rage because of the rampant racism in America, your breath is there for you as a vehicle for transformation and healing.

Breathe with me!

Release, renew and relax with these three breathing exercises designed for the times. Yoga and Mindfulness instructor, Sojourner Williams (www.sojournerwilli...

Deep breath in and let it OUT!


Quarantine Yoga Class for Kids

Hello there! Last month, I shared a yoga video for school aged children and tweens. To balance things out a bit, I’m going to share this new video geared towards children aged 2-8.

MMKkaOjiSIq8CoDCuX5zOg.jpg

Now I know, that’s a broad age range, but there’s something in this practice for EVERYONE!

Toddlers can practice with their grown-ups and or siblings, while older and more independent children can watch and practice on their own.

Especially now that the weather is warm and in some parts of the country, school is out, children need activity, they need to move.

This is a video that you can return to regularly and can be great fun for the entire family.

Lets enjoy a country getaway! We will smell flowers, visit with butterlies, a cat, a cow and a puppy, and even befriend a sleepy sloth. This class is easy to...

I hope the school aged children in your life enjoyed this practice!

If you’re looking for a way to introduce yoga to your children, I teach a regular KIDS AND FAMILY YOGA CLASS on ZOOM every Saturday from 11:30- 12:00 EST. The class is geared towards children (roughly 2-8 years of age) and their grown ups.

The link to register can be found here :

https://app.acuityscheduling.com/schedule.php?owner=15104885&appointmentType=5650274

I hope to see you on ZOOM!

A Yoga Class for Children

As we navigate this “new normal” of social distancing and self-isolation, perhaps no segment of the population has experienced as seismic of a shift as our children.

Their regular routines disrupted, remote learning, no more play dates or interactions with friends, beloved extra-curicculars on halt, no summer camp to look forward to, no summer vacation to look forward to, no visits to grandparents to look forward to, it’s a lot to process.

Despite it all, children are extremely resilient and there are a lot of tools that we as parents, guardians and loved ones have, to help support them during this time. One such tool is yoga.

Yoga allows children to move their bodies, providing a joyful, physical outlet. Yoga creates the space for children to explore their breath providing a mental and emotional outlet, whether through deep calming breaths or vigorous fiery roaring breaths. During a yoga practice, children are instructed to navigate their imaginations as they engage in kinesthetic creative play.

Kids yoga looks a bit different depending upon the age group, but this 20 minute video, geared towards students roughly aged 8-12, is designed for children to be able to watch independently and practice independently.


I hope the school aged children in your life enjoyed this practice!

If you’re looking for a way to introduce yoga to your children, I teach a regular KIDS AND FAMILY YOGA CLASS on ZOOM every Saturday from 11:00-11:30 EST. The class is geared towards children (roughly 2-8 years of age) and their grown ups.

The link to register can be found here :

https://app.acuityscheduling.com/schedule.php?owner=15104885&appointmentType=5650274

I hope to see you on ZOOM!

Interactive yoga classes for school aged children coming soon (SUMMER 2020)!

Chocolate Chip Buttermilk Drop Biscuits: You Won't Believe These are VEGAN!

My children have been making all sorts of requests of me in the mornings. They are sick and tired of their standard breakfast fare and they’re missing the new flavors and textures that were within reach in New York City.

In New York, brunch was a true weekend reality, something everyone in the family looked forward to with eager anticipation.

With the city on lockdown and the fact that we’re self-isolating hundreds of miles away in Maryland, I’ve had to get really creative in the kitchen to keep little mouths happy.

Originally, I was going to make this recipe without chocolate chips, but a certain five year old would have no such thing.

So I made some changes, and a lovely breakfast treat was born!

Chocolate Chip Buttermilk Drop Biscuits!!!!!!!!!

You’ll Need:

2 cups flour

1/4 cup corn meal

1 tablespoon baking powder

1/2 teaspoon baking soda

1 teaspoon pink salt

4 tablespoons olive oil

1 cup almond milk

1 tablespoon white vinegar

IMG_1692.jpeg

chocolate chips to taste

Here’s What to Do:

  1. Preheat your oven to 450 degrees F

  2. In a separate bowl, combine your milk and vinegar (to make buttermilk) and set aside

  3. In a large bowl, combine your dry ingredients.

  4. Add olive oil and use your fingers to combine until a crumbly consistency is achieved. Cover the bowl and refrigerate for 20 minutes.

  5. Add the buttermilk mixture a tablespoon at a time and use hands to combine the dough.

  6. Add chocolate chips once the mixture is sticky and combine, working hands through dough.

  7. Form balls of dough with your hands and place on an oiled baking sheet.

  8. Bake for 15-20 minutes until golden on top and the center is fully cooked.

IMG_1693.jpeg

Serve with your favorite vegan butter, honey or jelly and enjoy, enjoy, enjoy….

IMG_1694.jpeg

Delicious down to the very last crumb!

Three Essential Oil Blends to Get You in the Mood for Spring!

In need of a quick mood boost or change of ambiance? Aromatherapy is a direct and pleasurable way to engage the senses.

IMG_1705.jpeg

Aromatherapy, through the use of pure essential oils is both therapeutic and enjoyable. Here are some blends that when diffused, will instantly have you feeling connected to nature and in the mood for spring.

Three Essential Oil Blends to Get You in the Mood for Spring

Blend #1 (Spring Awakening)

10 drops pure Lemon essential oil (uplifting, clean, crisp, citrusy)

5 drops pure Jasmin essential oil (floral, sensual, romantic)

3 drops pure Sandalwood essential oil (earthy, grounding)

Blend #2 (Herb Garden)

5 drops pure Lavender essential oil (floral, calming, fresh)

3 drops pure Lemongrass essential oil (fresh, sweet, citrusy)

3 drops pure Thyme essential oil (clarifying, uplifting, astringent)

2 drops pure Chamomile essential oil (calming, mood stabilizing, sweet)

1 drop pure Oregano essential oil (spicy, astringent, fresh)

Blend #3 (After the Rain)

5 drops pure Vetiver essential oil (grounding, earthy)

3 drops pure Lavender essential oil (floral, calming, fresh)

2 drops pure spikenard essential oil (woodsy, spicy, uplifting)

1 drop pure Cinnamon essential oil (sweet, warming, spicy)

Adjustments.jpeg

Simply add purified water to your diffuser and then drop by drop, carefully add the essential oils needed for your desired blend.

Adjustments.jpeg

Prepare to be transported…

Take the Trip of a Lifetime Without Leaving Your Home: Travel Shows Sure to Soothe Your Wanderlust

So, it appears we’re not going anywhere for a while. Spring break plans, summer plans, quite honestly, plans for next week, are slowly becoming obsolete as the reality of this global pandemic sets in. So it is.

Though we’re physically bound to our homes, our hearts and imaginations are free to soar to the highest heights.

Slowly I’m making peace with the fact that this summer will most likely be spent in quarantine. Instead, with a little help from some amazing television travel shows, I’m using this time to dream up the perfect getaway for whenever time allows.

IMG_1450.png

Before this Coronavirus pandemic hit, my husband and I were planning to spend part of the summer in Mozambique and South Africa. It was to be a dream vacation, now that the kids are old enough and hearty enough for serious travel.

We were about a week away from purchasing our tickets when the travel industry began to grind to a halt.

We still intend to go. We have placed our vacation on temporary hold. In the meantime however, my soul and imagination have embarked on a myriad of sanity maintaining adventures, as I live vicariously through the travels of Samantha Brown, Samin Nosrat, Marcus Samuelsson, and Anthony Bourdain. In short, I have found my wings by watching travel shows.

I don’t have cable tv, instead, I use streaming services, so this list is reflective of shows available beyond cable television.

Take the Trip of a Lifetime Without Leaving Your Home: Travel Shows to Soothe Your Soul:

1) Journy Channel

I was playing around with my television a week or so ago when I came upon the Journy Chanel (no spelling error, there’s no “e” in this journey). The Journy channel appears as a downloadable channel on my Smart TV. I had never heard of it, but decided to explore nonetheless and was pleasantly surprised to find an entire lineup of engaging travel shows.

My Favorites:

  • The classic Anthony Bourdain: No Reservations. I was obsessed with this show in the early 2000’s. It probably needs no introduction, but just in case, in this 9 season series, the late chef, Anthony Bourdain took his viewers on a cultural and culinary journey through locations far and wide. Full of insight, beauty and equal part snark, this is a must see series if you haven’t already and if you’re already a fan, the series is just as riveting the second time around!

  • Amazing Hotels, hosted by Giles Coren and Monica Galetti will make you want to grab a notebook and pen and add to your bucket list. Each episode centers around a destination hotel. My favorite episode is their visit to the Giraffe Manor in Kenya- definitely up there on my bucket list!

2) PBS

I am a shameless and unabashed PBS junkie. I love Great Performances, Nova, Masterpiece Theatre, PBS News Hour and I am so motivated and inspired by their travel content. I’m a PBS passport member, which allows me to access their content past and present via the app on my Smart TV or phone. Your local PBS station may not air all of the shows I’m about to reference, but they are all available via the PBS app.

My Favorites:

  • Globe Trekker, was the first travel show that I can remember becoming obsessed with, in the late 90’s. This epic, 17 season series, follows a rotating cast of hosts as they traverse the globe, exploring the food, culture and customs that make this world such a beautiful and diverse place. The cinematography is stunning and the emphasis is on slow, culturally immersive travel.

  • No Passport Required, is a newer show hosted by the quirky genius chef, Marcus Samuelsson. In this show, Samuelsson explores various cities restaurant by restaurant, uncovering the cultural nuances of each city through its food.

  • Curious Traveler, hosted by Christine van Blokland examines the art, architecture and food that define cities throughout the world. This is an excellent show to watch if you’re planning a trip, as you’ll leave full of ideas.

  • Samantha Brown’s Places to Love, hosted by the one and only Samantha Brown is a fantastic show if you’re interested in places to visit with your family. I’ve been a big Samantha Brown fan since her days on the Travel Channel with Passport to Europe and Passport to Latin America. In Samantha Brown’s Places to Love, Brown expertly guides viewers through her favorite cities, highlighting where to go, what to do and what to eat.

3) Netflix

Netflix has no shortage of engaging and awe inspiring travel related content. Netflix is a streaming service that you will have to sign up for if you’d like to access the various shows. It’s relatively inexpensive, and can be viewed via your phone, computer or Smart TV.

My Favorites:

  • Salt, Fat, Acid, Heat hosted by chef Samrin Nosrat, explores the culinary traditions of countries around the world as they use salt, fat, acid and heat in their cooking. This show not only makes me want to cook, but with each episode, I am compelled to visit the places she’s been if only for one glorious meal, to experience first hand the food of the region. The vivid cinematography in this series is candy for the eyes.

  • Tales by Light is perhaps one of the most visually stunning shows out there. The series follows National Geographic photographers as they travel the world to share the stories behind some of the most iconic NatGeo photographs.

  • The Kindness Diaries follows host Leon Logothetis as he travels around the world via motorbike, existing solely off of the kindness of strangers he encounters along the way. Deeply affirming and full of humanity, this series will make you want to connect with your neighbors and even strangers in ways you may not have thought to before.

So there it is, my list of favorites. This is how I’m keeping my wanderlust at bay, until I’m able to take that dream vacation, we so lovingly planned.

Mozambique, I’ll see you again soon!

Mozambique, I’ll see you again soon!

What travel shows have you been watching lately? Have you had to put travel plans on hold?

5 Yoga Practices to Ease Anxiety and Fear

We are navigating unprecedented and surreal times.  It is both humbling and terrifying to see our nation, the cities that we love, and countries around the world literally grind to a halt.

We are being asked to act for the collective good, to think not only of ourselves and loved ones, but of our neighbor’s and of strangers we may never see. We’re being asked to give up the most prized American virtue, our “freedom” in lieu of staying indoors. 


It’s striking us in different ways depending upon who we are, but everyone is affected. 


Stay indoors!


Whether you are sick or don’t feel sick.


Stay indoors!


Flatten a curve that you can’t see but are being asked to believe in. 


Stay indoors!


Don’t bother wearing masks.

Okay, now everyone must wear a mask. 

For many, at the core of their identity, is this perception of freedom, this perception that we are free to control our destinies and that we are in control. When this veil of illusion is shattered, as in the case of a global pandemic that is becoming more tangible by the hour, the result can be extreme gut-wrenching anxiety.


IMG_1451.png

This is where our yoga practice can come in handy. 


Yoga teaches us that the only reality, is the reality that exists in the present moment. 


Yoga teaches us that we can’t control the whole, but we can control our inner, our internal environment, our breath, our thoughts and in that way, surrender willingly to the unknown because despite the storm that may be raging on the outside, we can cultivate peace and centeredness on the inside. 


In a present environment where there is so much uncertainty, where nothing feels familiar, yoga can light the way. 


In a culture where we value movement over stillness, productivity over quality and are fueled by the constant urge to compete and achieve, this moment that we’ve arrived at, is a much-needed pause, an invitation to turn inwards and truly examine ourselves, our choices and determine what is truly important. 


“We are not going to change the whole world, but we can change ourselves and feel free as birds. We can be serene even in the midst of calamities and, by our serenity, make others more tranquil. Serenity is contagious.”

-       Sri S. Satchidananda, The Yoga Sutras


Five Yoga Practices to Ease Anxiety and Fear:


1)    Breath of Fire: Breath of fire is a purifying and energizing breath that takes us out of our own heads, out of the anxieties and stresses of the moment, allowing us to find a sense of calm and equanimity.

Adjustments.jpeg

To practice Breath of Fire, sit comfortably with an erect spine. Take a deep breath in through your nose and out through your mouth, and then let your lips come together. 

The subsequent breaths will come in and out through your nose. As you exhale, your stomach muscles contract and your navel pulses back towards your spine. Practice for a minute, then take a break for a few seconds, taking in all sensations. Continue for as many rounds as needed to feel clear of anxiety and fully present. 

2)    Supine Twists: Supine twists are poses that cleanse the body, relax the nervous system and induce calm. 

To practice a supine twist, lay on your back. Draw one leg in towards your chest and then cross your leg over your torso in the direction of your elongated leg. Try to keep your shoulder blades on the mat. As you inhale, imagine creating length through the spine and as you exhale, imagine deepening your twist. This can be practiced with your top leg extended or with both legs bent for variation. 

3)    Forward Folding Poses: Forward folding poses are deeply nourishing and calming as they invite us to turn inwards and reflect. When you’re folding forward, you’re opening up the back body, to release tension in the neck, jaws, lumbar spine and shoulders. A gentle forward fold, held for three to five minutes, is a great way to decompress from stress and anxiety. 

IMG_7828.jpeg

To practice a forward folding pose, sit comfortably, with legs extended, crossed or straddled wide. Take a deep breath in to lengthen the spine, and when you’re ready to exhale, hinge at the hips, keeping your back as straight as you can for as long as you can, before rounding in towards yourself by releasing your shoulders and head. 

4)    Ujjayi Breath: Ujjayi breath, also known as Ocean Breath is a truly grounding and pacifying breath. In this breath, the central nervous system is given a massage and our relaxation response is initiated. 

To practice Ujjayi breath, sit comfortably with an erect spine. Tuck your chin towards your chest so that there is length in the back of your neck. Draw your lips together to touch and then breathe in through your nose and out through your nose. As you breathe, let the breath audibly brush against the back of your throat. It will make a gentle roaring sound like the ocean. Practice for 2-3 minutes, take a break and repeat as needed.

5)    Progressive Relaxation Meditation: Progressive Relaxations Meditations are an excellent way to create a sense of peace and ease in the physical body as well as in the mind and spirit. 

Adjustments.jpeg

To practice a progressive relaxation, lay on your back then send your energy and focus to a single or group of body parts. Tense the muscles in that body part or body parts, squeeze tight, and then release, taking in the sensation of your body relaxing. Typically, we work from our feet to the crown of our head. 


If you find yourself dealing with increased anxiety and fear, give one or all of these techniques a try.
Introduce one at a time, embrace the present moment and above all else, breathe. You can and will make it through this. Summer is right around the corner.


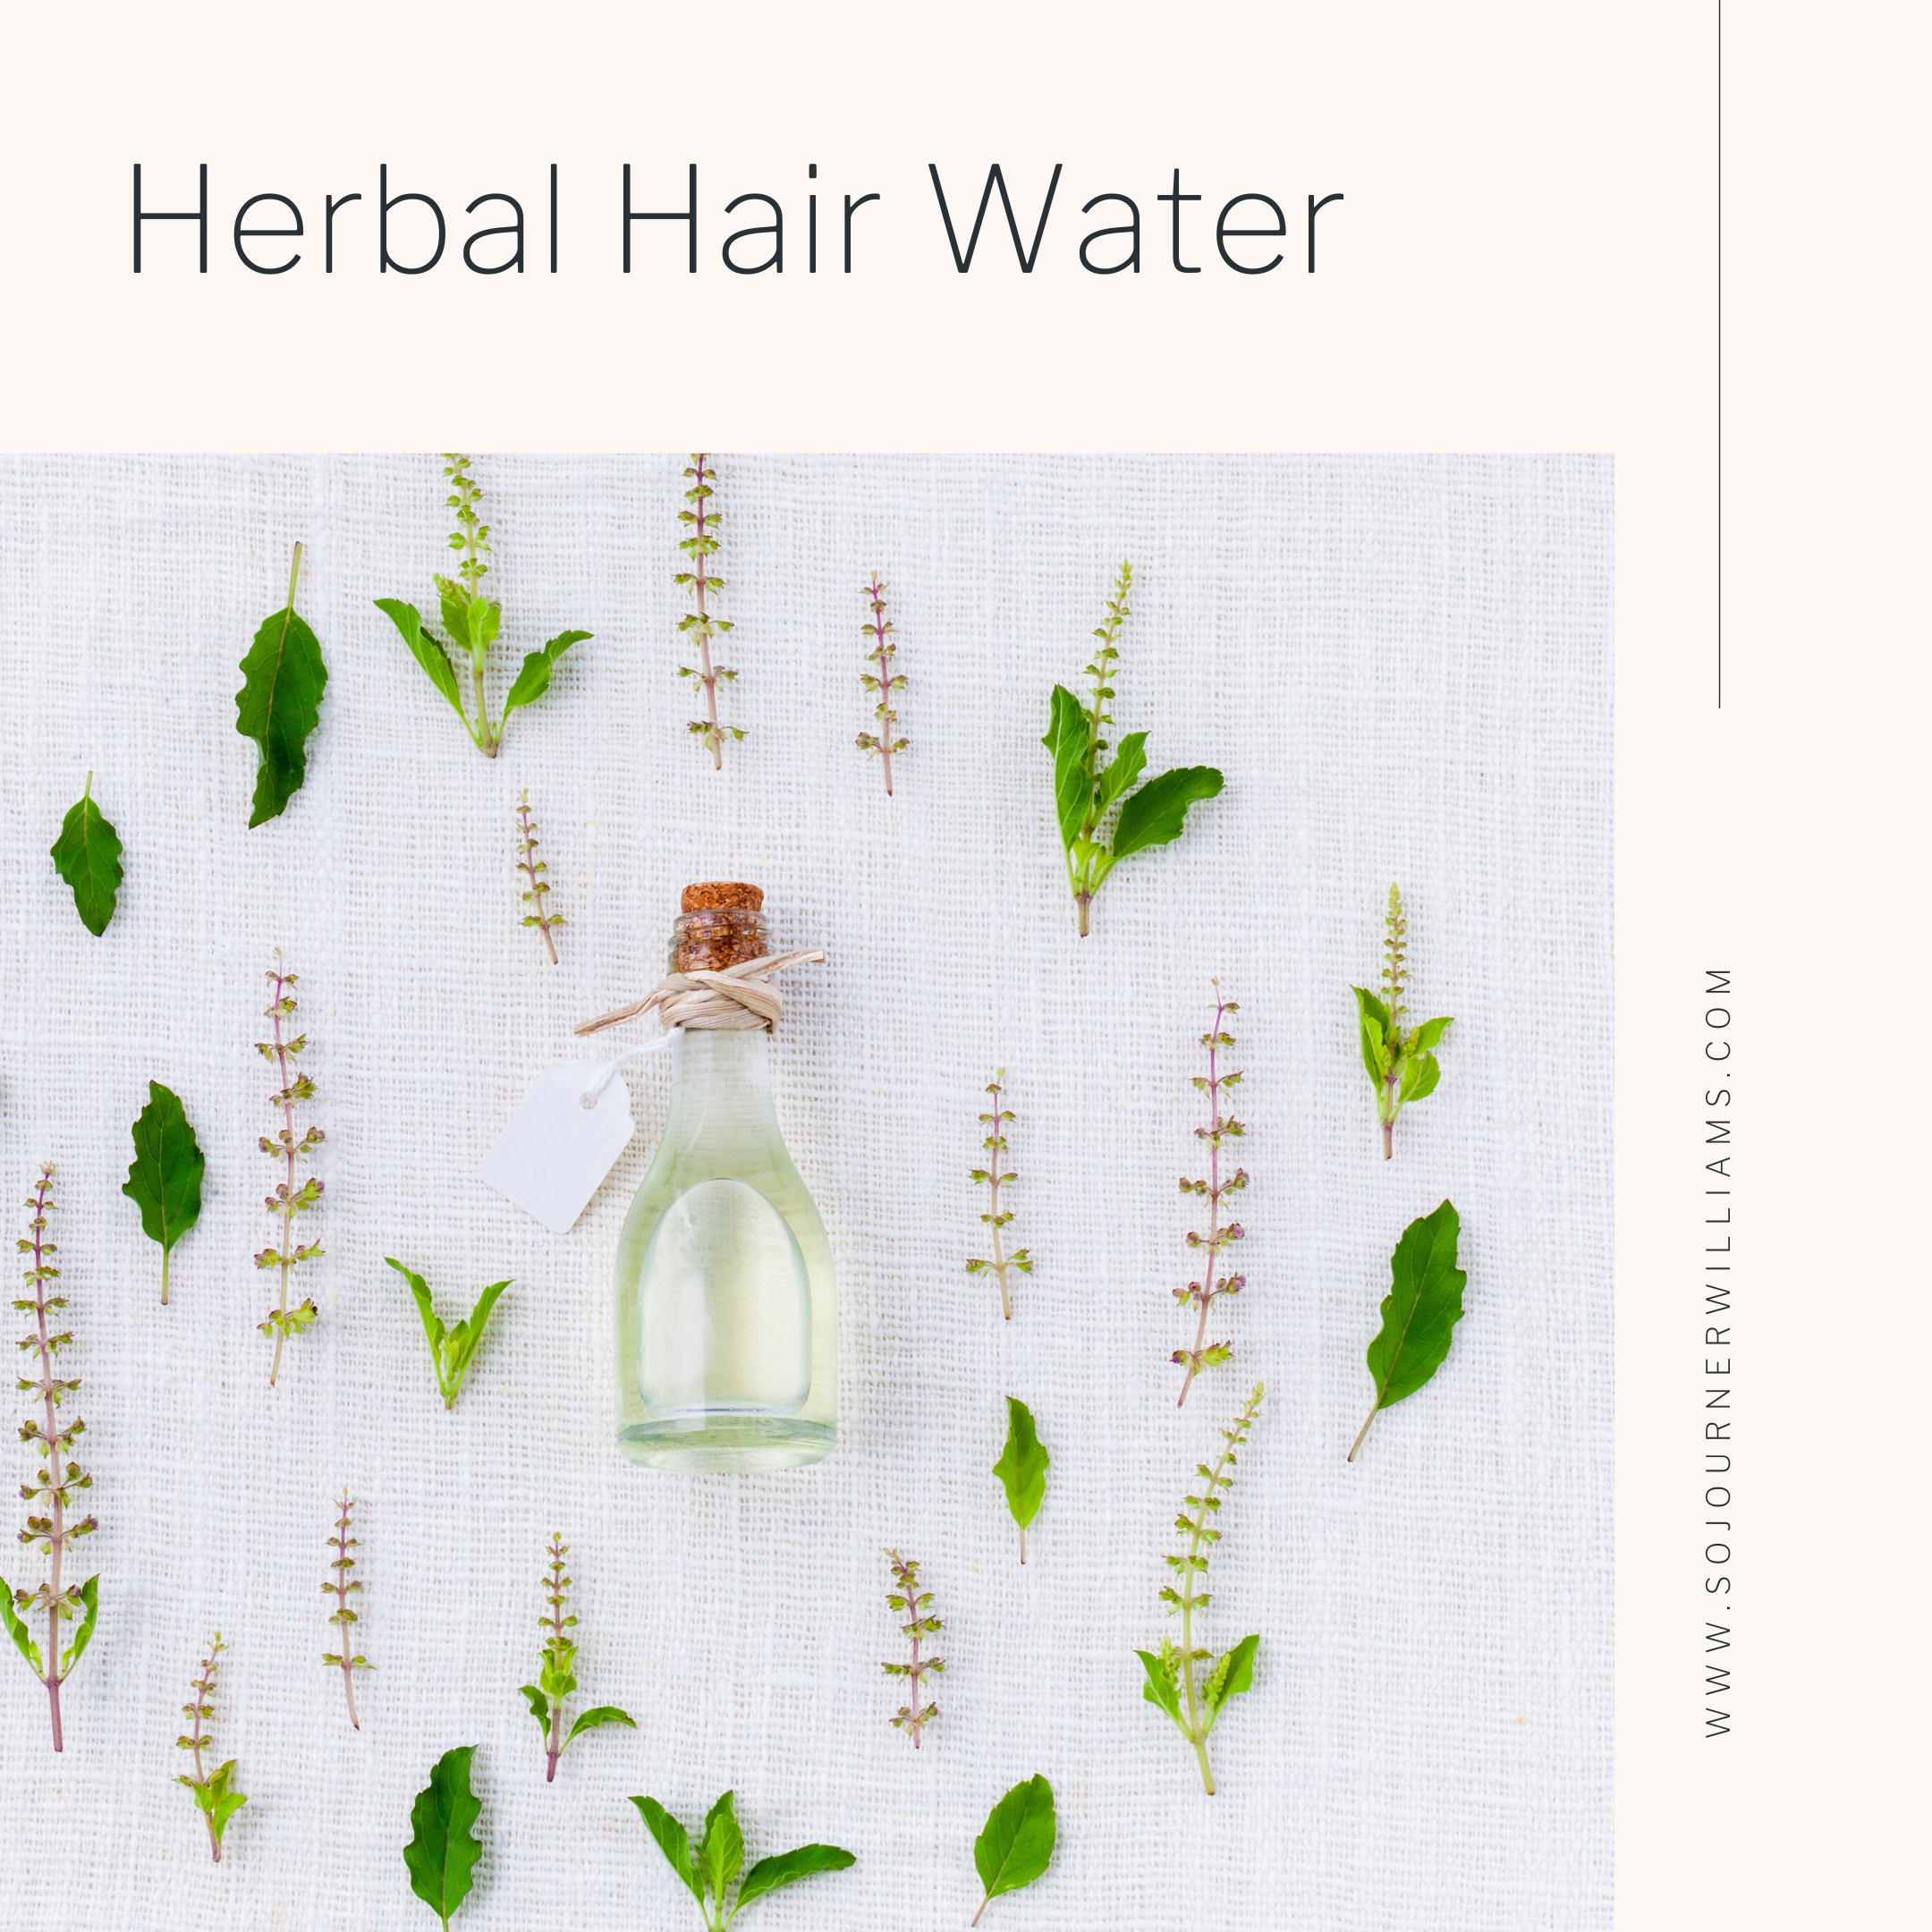
Herbal Hair Water

IMG_1459.png

This post goes out to my curly and wavy haired folks.

Curls, ringlets, coils and waves, we love them, but they can be sooooo much work! This herbal hair water, makes styling and maintenance between washes so much more delightful.

Adjustments.jpeg

My herbal hair water recipe can be made in a water bottle and used in lieu of regular tap water for styling.

Herbal hair water packs a powerful punch and provides hair with a dose of micronutrients and moisture designed to keep hair soft, frizz free and fragrant.

Here’s what you’ll need:

  • 8 ounce spray bottle

  • Purified water

  • Chamomile essential oil (15 drops)

  • Lavender essential oil (10 drops)

  • 1 teaspoon spinach seed oil

  • 1 teaspoon vegetable glycerin

Here’s what to do:

  1. Fill your spray water bottle 3/4 of a way full with your purified water.

  2. Add a teaspoon of spinach seed oil and a teaspoon of vegetable glycerin. Screw on the top to your spray water bottle and shake gently until blended.

  3. Unscrew the top of the spray bottle and add the lavender and chamomile essential oil. Screw on the top of your spray water bottle and shake gently again until blended.

  4. YOU’RE READY, BEAUTIFUL!!!!!!!!

Herbal hair water, is a fantastic way to nourish your hair because:

  • Chamomile essential oil is known to soften hair and provide great shine.

  • Lavender essential oil is fragrant, antibacterial and antimicrobial, providing gentle cleaning between washes. Lavender also promotes hair growth and clarifies the scalp.

  • Spinach seed oil promotes hair growth and prevents hair loss. Loaded with iron, essential fatty acids, potassium, vitamins (C, A, B1, B2, B6, E, and K), magnesium, antioxidants and chlorophyll, spinach seed oil revives and strengthens dull and lackluster hair.

  • Vegetable glycerin provides moisture and reduces frizz.


With Spring in the air, this herbal hair water blend will help transition your hair from winter dull to warm weather fabulousness- even if, you’re not leaving your house.

For more DIY natural skin care ideas, check out my latest book Natural Beauty from the Outside In, where you’ll find 70 Ayurveda inspired hair and skin care recipes.

Like What You've Read? SUBSCRIBE to Sojourner's Sojourns (It's free!)


Liquid Hand Sanitizer DIY

Needless to say, these are interesting times. Two weeks ago, who would have thought that you’d need to hoard hand sanitizer? Or that it would sell (in some instances) for $20.00 on eBay?

Festive Broccoli  Rice A Low Carb Starch Alternative.png

Luckily, when it comes to keeping your hands clean, soap, warm water and 20 seconds of washing is still your best defense.

But there are times, when soap and water aren’t an option. In these instances, this easy to tote, liquid hand sanitizer can definitely come to the rescue!

IMG_1022.jpeg
IMG_1024.jpeg

Here’s What You’ll Need:

1.5 ounces of rubbing alcohol (at least 70 proof)

.5 ounces of witch hazel

20 drops tea tree essential oil

10 drops lavender essential oil

1/2 teaspoon vegetable glycerin

Here’s What to Do:

You can mix your ingredients directly into your 2 ounce spray bottle.

Measure out your rubbing alcohol, add your witch hazel and then the vegetable glycerin. Shake vigorously to blend.

Drop in the essential oil. Shake a second time and you’re ready for use.

IMG_1023.jpeg

I keep a bottle in the car and in my purse these days, just in case. Despite the high alcohol content (which is needed to kill the virus), this formula is not overly drying because of the witch hazel and vegetable glycerin, which makes back to back applications easy to endure.

Stay safe. Stay healthy. Chin up.

For more DIY natural skin care ideas, check out my latest book Natural Beauty from the Outside In, where you’ll find 70 Ayurveda inspired hair and skin care recipes.

Amethyst Mylk

I am a firm believer that there is a “mylk” out there for everyone.

This particular treat, both alluring in color and taste was inspired by N’Djamena @Fleurverte_studio. Last month, I had the pleasure of visiting her light filled Williamsburg studio and amethyst mylk was on the menu!

Amethyst Mylk.png

So…what is it?

Good question. Despite the name, you’re not consuming ground bits of amethyst. Instead, the mylk gets its name from the amethyst color that the beverage takes on through a series of seemingly magical steps.

Amethyst mylk is actually made from combining butterfly pea powder and beetroot powder. Its the combination of blue and red, that creates its lovely violet color.

IMG_0833.jpeg

But why??? Why would anyone drink this oddity?

Well, there are a ton of health and beauty benefits! And it tastes amazing.

Let me break it down. Butterfly pea powder and beetroot powder, the main ingredients have the following properties:

  • rich in antioxidants (beetroot)

  • high fiber (beetroot)

  • full of nutrients like calcium, iron, potassium, folate and maganese (beetroot)

  • anti-aging, anti-glycation properties (butterfly pea)

  • antioxidant rich (butterfly pea)

  • boosts cellular regeneration (butterfly pea)

  • improves hair growth (butterfly pea)

  • improves eyesight (butterfly pea)

  • analgesic (butterfly pea)

  • anti-inflammatory (butterfly pea)

60166917690__724451DE-276D-44BA-878A-57091752CA09.jpeg

So let’s get down to business!

Here’s what you’ll need:

1 cup of your favorite milk or mylk (I prefer unsweetened vanilla almond for this recipe)

1 tablespoon of butterfly pea powder

1 1/2 teaspoons beetroot powder

1/2 teaspoon vanilla extract

1/2 teaspoon ground cardamom

1/4 teaspoon ground cinnamon

1/4 teaspoon ground ginger

Here’s what to do:

In a blender, first pour your milk and vanilla extract, then add your powders and spices.

Blend on low speed until thoroughly combined and a beautiful amethyst color is achieved.

*Note: you can add honey to taste or a dropper full of your favorite adaptogenic tincture

Serve cold and garnish with something purple ex) lavender buds, violet petals

Bonus points, if you use an amethyst coaster ,)

(photo by: N’Djamena Walker @Fleurverte_studio)

(photo by: N’Djamena Walker @Fleurverte_studio)

So pretty and fun! Self-care at its finest. Have a drink to your health and beauty.

For more floral and crystal alchemy inspiration visit @fleurverte_studio.

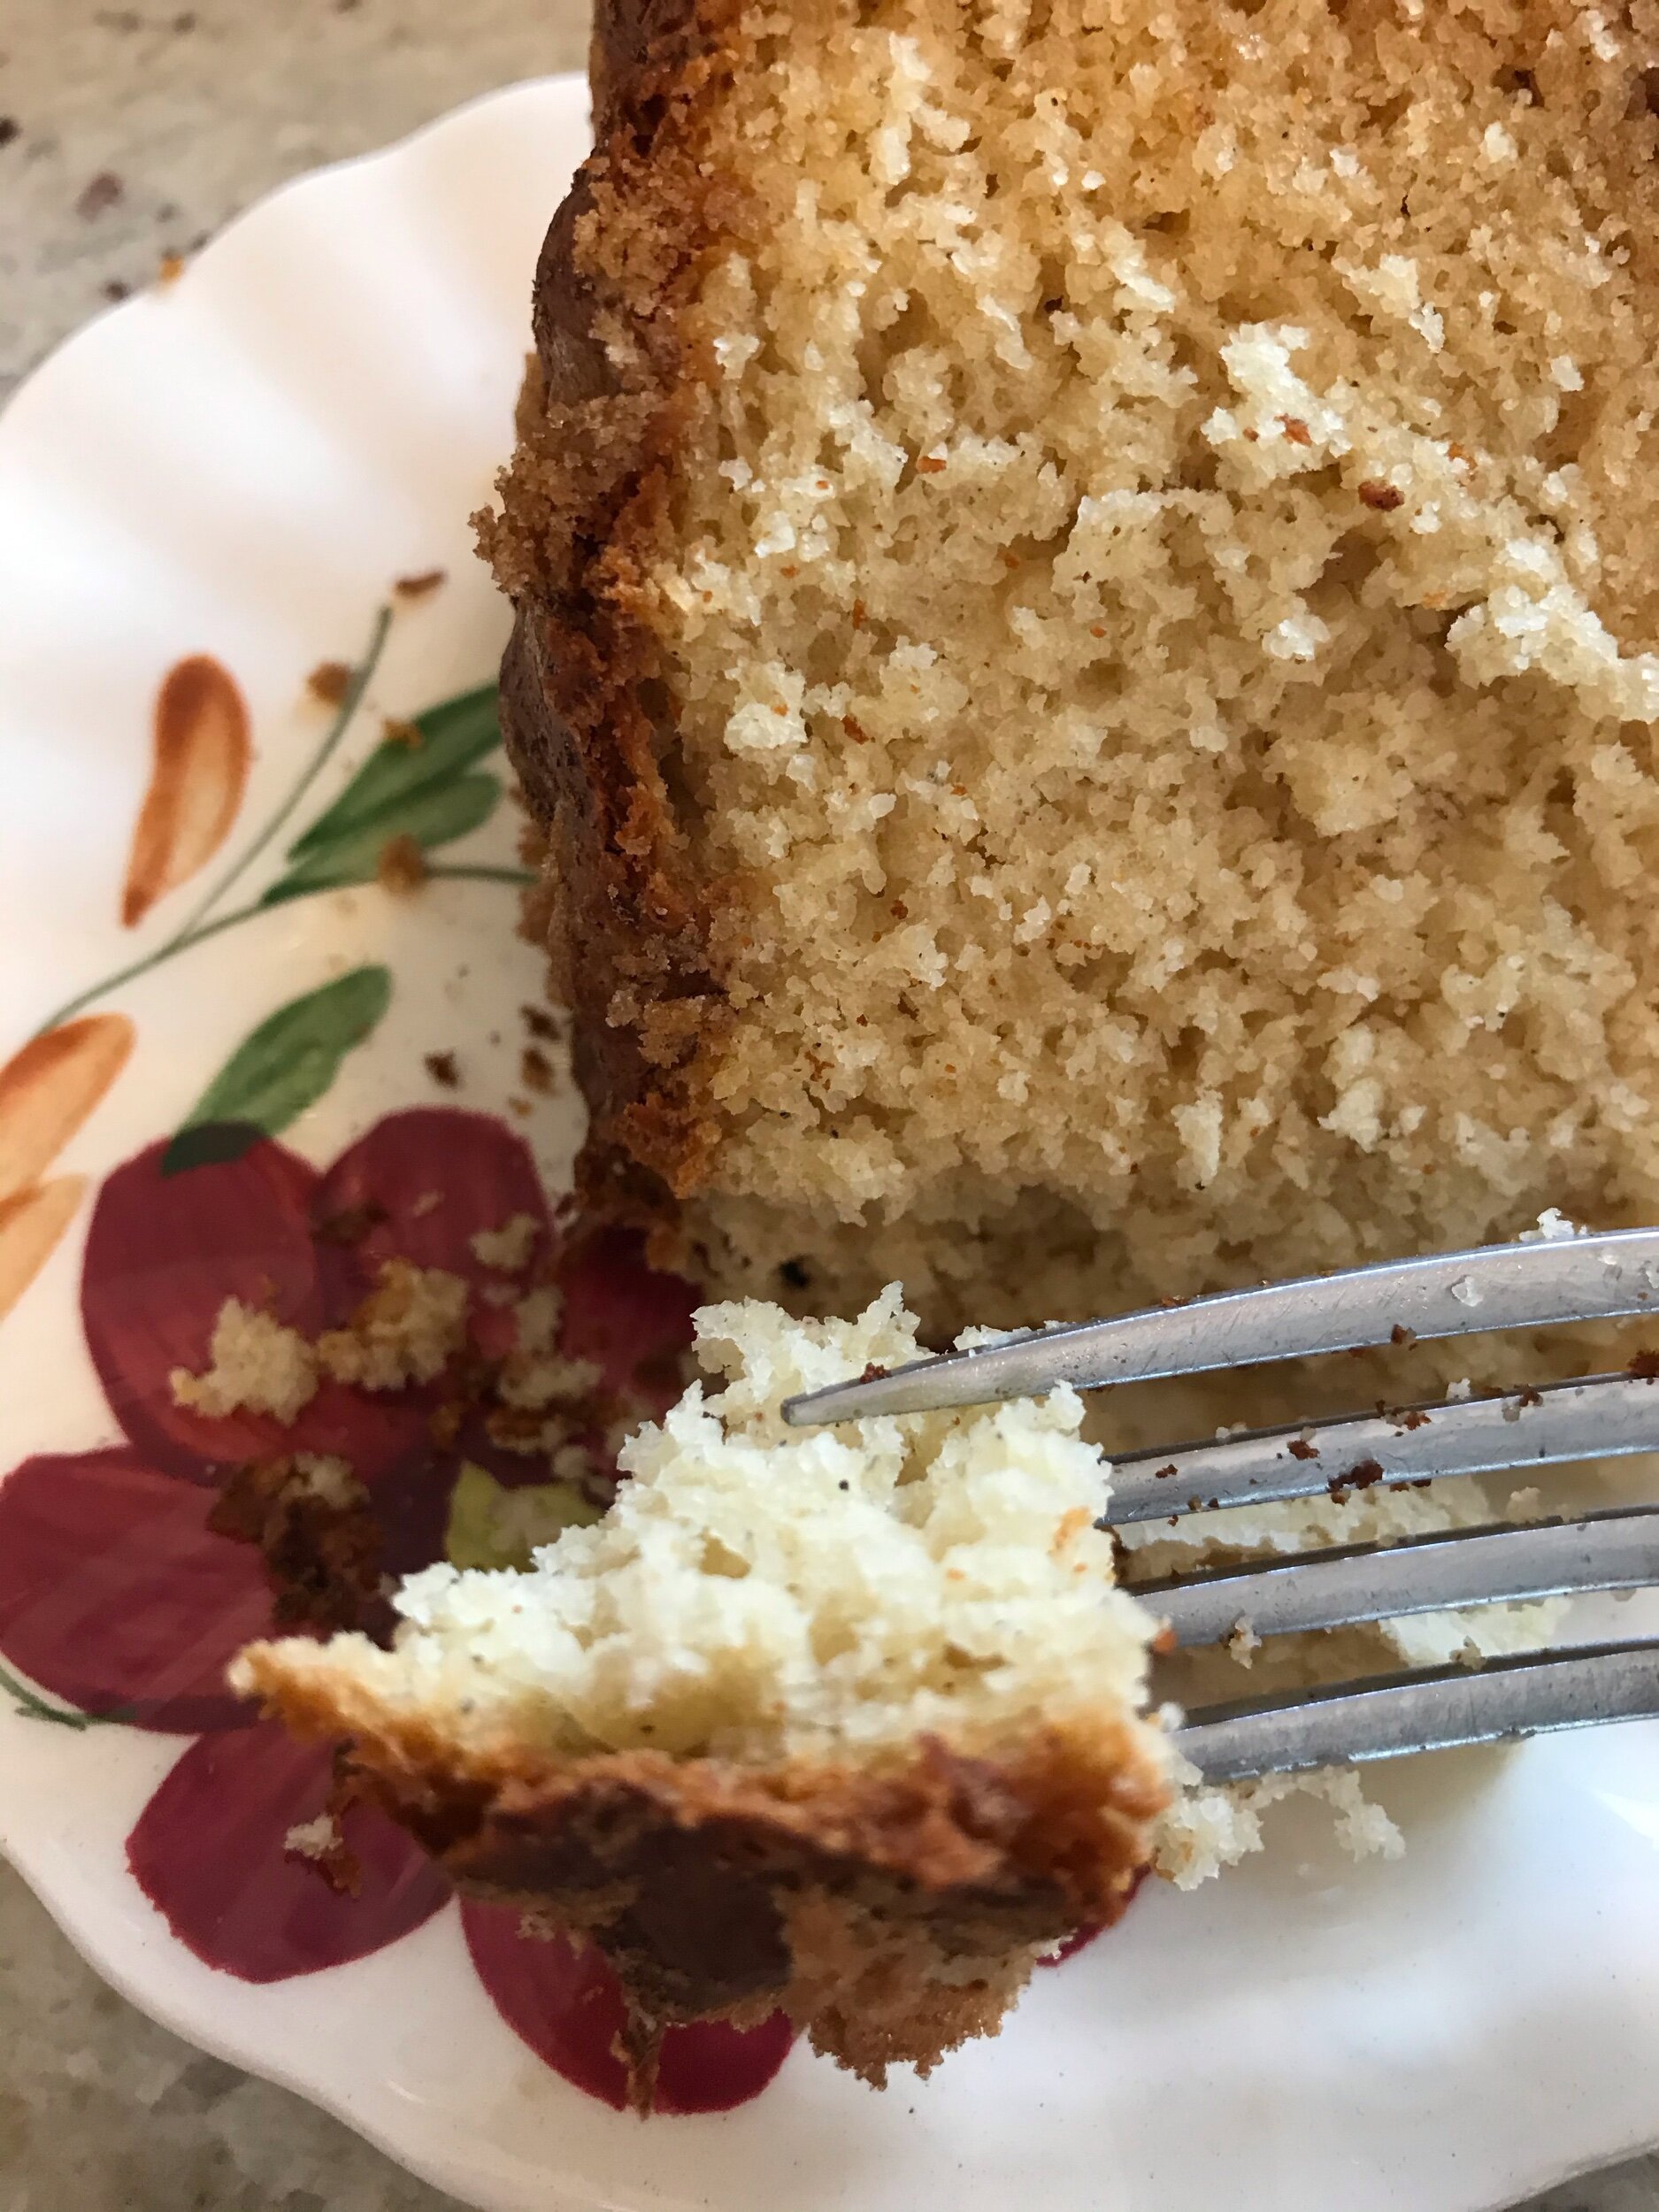
Winter Spice Breakfast Bread

Winter Spice Breakfast Bread.png

This breakfast bread recipe is quick and satisfying and full of complex flavor.

Here’s What You’ll Need:

4 cups all-purpose flour

1 teaspoon pink salt (finely ground)

1/4 cup pure cane sugar

1/4 teaspoon ground ginger

1/2 teaspoon ground nutmeg

1 teaspoon ground cardamom

1 teaspoon almond extract

1 large orange (juice and pulp)

1/3 cup olive oil

1 1/3 cup milk

1 egg

1 teaspoon baking soda

1 1/2 teaspoon baking powder

2 tablespoons honey

1 tablespoon greek yogurt

Brown sugar + cinnamon for decoration

Here’s What You’ll Do:

In a mixing bowl whisk together your olive oil and eggs. Mix in the almond extract and honey. Next, add the greek yogurt and milk blending until smooth.

In another mixing bowl, combine dry ingredients (flour, salt, sugar, baking soda, baking powder, ginger, cardamom, nutmeg) until uniform.

Add your dry ingredients to your wet ingredient bowl in quarter sections.

Once the wet and dry ingredients have been completely combined mix in the juice and pulp of the orange.

Preheat your oven to 375.

Use coconut oil to coat a circular baking tin. Pour the batter into the pan and sprinkle cinnamon and brown sugar on top.

Bake for 45 to 50 minutes until a toothpick inserted at the center comes out clean.

Cool before slicing.

IMG_0807.jpeg
IMG_0809.jpeg
IMG_0806.jpeg

This winter spice breakfast bread pairs well with honey butter and coffee!

Super Greens Sautee

Super Greens Sautee.png

Greens don’t have to be boring!

In fact, they can be and are downright delicious if you coax out the flavor and set them up to shine. This super greens sautéed recipe does just that.

It’s got texture, bold flavors, color variety and can be eaten alone, as a side, or as the foundation of a mean green Budha bowl.

Either way, these are not your grandmothers boiled, soggy, bland, greens. These are SUPER GREENS!

Here’s What You’ll Need:

3 cups chopped organic purple kale

3 cups chopped organic dinosaur kale (also goes by Tuscan)

1/2 cup finely chopped organic purple cabbage

1/2 cup finely chopped organic green cabbage

1 tablespoon ghee (here’s an easy RECIPE if you don’t have any on hand)

1 tablespoon extra virgin olive oil

1 teaspoon unrefined coconut oil

1 teaspoon ground black pepper

1/2 teaspoon coarse pink Himilayan sea salt

1/4 teaspoon finely ground mustard powder

1/4 teaspoon white pepper

1/8 teaspoon finely ground green cardamom

Here’s What to Do:

In a small bowl or ramekin combine your spices and set aside.

In a frying pan, heat ghee and add the dinosaur kale and a few pinches of spice mix. Over medium/high heat, sautee the dinosaur kale, until soft, glossy and rich green in color.

Place your sautéed dinosaur kale in a large heat resistant serving bowl.

Return to your frying pan, add olive oil and chopped purple kale and a few pinches of spice mix. Over medium heat (olive oil is heat sensitive) sautee your purple kale until soft, glossy and rich purple/green in color.

Place your sautéed purple kale in the container with the dinosaur kale and toss until combined.

Return to your frying pan, add the coconut oil and the green and purple chopped cabbage. Add the rest of your spice mix and sautee over medium/high heat until the edges begin to turn golden and the cabbage becomes glossy and just a bit soft.

Place your sautéed cabbage in the container with the dinosaur kale and purple kale and toss until combined.

You’re ready to enjoy!

This dish can easily stand alone or can add color and flavor to your plate to complement your main dish.

And did I mention that the kale and cabbage add a healthy punch? This dish is full of antioxidants, vitamin C, B vitamins, beta-carotene, fiber, magnesium, iron and calcium.

Then with the combination of healthy fats, hello olive oil and coconut oil and ghee (acceptable by some vegans thus making this dish potentially vegan) this dish is a great compliment to a Keto diet.

And the dish tastes great with roasted garlic, dried cranberries or onion crisps on top if you’re so inclined.

Both kid and husband approved (thank goodness) these sautéed super greens are a great way to jump start those healthy habits in 2020.

IMG_0721.jpeg

Treat Your Autumn Skin to Some Ayurvedic Wisdom

IMG_0050.png

Autum is so transformational!

It marks the end of heat and humidity (at least here on the east coast of the USA) and the beginning of a cooler dryer shift.

Autumn is expansive and cooling, it’s dry and spacious, as if beckoning us to make room in our bodies for the momentous new energy thats literally being blown towards us.

The days are shorter as we begin to reset academic and professional goals, paving the way for creativity, planning and the execution of objectives.

(photo cred: @jakobowens1)

I absolutely adore this time of year, however despite the enthusiasm of my mental and spiritual self, my physical body doesn’t seem to be a fan.

My skin goes from a golden shinning brown to a dull, ashen, wrinkled mess. My skin literally begins to wrinkle and crack in tandem with the dry falling leaves. My hair, once curly and soft turns to straw, my coils become limp and frayed. My lips crack, my eyes water, it’s just not a great time for my skin.

So to combat the extreme autumnal changes of my east coast climate, I draw upon my Ayurvedic knowledge to restore balance and vitality to my skin and hair.

If you struggle during the autumn, to maintain your skin’s moisture and elasticity, here are some great Ayurveda inspired tips to help you bring about harmony naturally.

Treat Your Autumn Skin to Some Ayurvedic Wisdom:

  1. Moisturize your skin with heavier oils to restore balance

    During the summer I use coconut oil, it’s light and cooling and provides just enough moisture but in the autumn, coconut oil isn’t enough. Some great autumnal oils to use on your skin are: olive oil, sesame oil and avocado oil. You can apply these oils (or a blend of all three) directly after your bath to keep skin soft and supple.

  2. Moisturize the ends of your hair and your scalp with oils to prevent dryness and breakage

    During the summer months, I just use a touch of jojoba oil at the ends of my curly hair to impart a bit of moisture. Those oils are great for the summer but don’t pack enough punch for me during the autumn months. Some great autumnal hair oils for your ends are: sweet almond oil, organ oil, and marula oil. For your scalp, try black seed oil.

  3. Moisturize your lips naturally with pure shea butter to combat wind damage and dryness.

  4. Tired dry eyes love soothing castor oil. I steam a washcloth and then apply a pea sized drop of castor oil to each eyelid. I rub the castor oil around my eyes (eyes closed of course!) then apply my warm steamed towel for ten minutes. I use the towel to wipe any remaining castor oil from my eye lids and voila!

Just as we change the way we dress and the way we eat for the seasons, we also have to shake up our self care routines.

Autumn is amazing!

But just because the leaves are becoming dry and brittle, it doesn’t mean your skin and hair has to as well. With a few insightful tweaks to your beauty care routine, your skin can glow like it did during the summertime.

After all autumn is too ephemeral. Get outside and enjoy it, because the moment you begin to layer on the sweaters, indulge in pumpkin spice everything, and get used to the cool evening breeze through your open window, winter moves in and shakes things up again!

For more DIY natural skin care ideas, check out my latest book Natural Beauty from the Outside In, where you’ll find 70 Ayurveda inspired hair and skin care recipes.

5 Reasons to Visit Chesapeake Bay, Maryland

IMG_1234.jpeg

What comes to mind when you think of the Chesapeake Bay?

For many of us, it’s a vision of three headed fish, frogs with eight legs, rancid bacteria infested water and toxic run-off as the Chesapeake Bay has dealt with its share of legitimate environmental issues.

But here and now, in 2019, things are so much better! The Chesapeake, thanks to restoration efforts is making a comeback and provides a stunning family friendly multi-season retreat.

5 Reasons to Visit Chesapeake Bay, Maryland

  • Those Views

    Rippling blue water juxtaposed against crystal clear skies. Vibrant seaside foliage draped in honeysuckle vines. The lapping waves, the songs of the seagull, the drumming of frogs, the melody of late afternoon crickets. The landscape, is simply stunning.

  • The History

    The Chesapeake Bay region was home to the Powhatan tribe, the same tribe of Pocahontas who lived on the shores and in the woodlands further mainland. John Smith’s famous voyage brought him down the Chesapeake Bay. Centuries later, the Chesapeake Bay region became an integral crossroad on the underground railroad. Harriet Tubman famously waded through its shallow marshlands as she ushered hundreds to freedom. Frederick Douglass crossed the waters to escape to the north. Decades after that, the Chesapeake Bay became a playground for the wealthy of Washington DC, Baltimore and Philadelphia. Stately seaside mansions were erected as the elite, with the advent of train travel, took the historic honeysuckle express (named for the fragrant honeysuckle that flourished in Southern Maryland, welcoming visitors to the Chesapeake region) to spend the weekend or the summer months at their seaside retreats on the Chesapeake Bay.

  • Family Friendly

    Chesapeake Bay, Maryland is a great place to visit with kids. From the old fashioned train museum near the Rod and Reel Resort, to the boardwalk full of ice cream shops to select beaches complete with playgrounds and pirate themed forts. Kids will have a blast! You can even book a pirate themed boat tour.

  • Inexpensive

    As far as seaside vacations go, resorts, rentals and hotels on the Chesapeake are very reasonably priced. Real Estate (if you’re looking to buy) is another story.

    Restaurants can run the gamut from moderately priced to expensive, especially since most feature fresh seafood, which tends to be pricier in general.

  • Great for Outdoor Enthusiasts

    The Chesapeake Bay is a water sport lovers dream!

    For fishermen, there are numerous quiet and serene boardwalks. If you prefer to be on the water, you can charter a boat or bring your own as there are plenty of places to dock and store a boat.

    Speaking of boating, popular on the Chesapeake are sailing, kayaking, and paddle boarding. You can rent or bring your own.

    The Chesapeake Bay is also a birders paradise. So many varieties to spy and plenty of organized groups to guide you.

Summertime isn’t the only time to enjoy the Chesapeake Bay. Southern Maryland has a relatively mild climate April through November. The autumn foliage along the Chesapeake Bay is truly something stunning and the area is quiet and serene in the winter as it gets decked out for the holidays.

Come for the weekend, stay for a week or two, but come visit the improved Chesapeake Bay!

*Please note than any links included in this post are purely for your convenience as this is in no way a sponsored post :)